
Not everyone can afford lengthy time in an established recording studio. If done right, a home studio can be inexpensive without sounding cheap. It is not about buying the cheapest entry-level equipment across the board. It is about budgeting and making smart choices. Spend… when it is essential. Save… when it’s practical. The flip side is that the process can be daunting. Economical options and clever workarounds can save you bucks, while allowing your music to be ready for review.
To create an inexpensive home recording studio – prioritize a quality computer, a Digital Audio Workstation, and an audio interface to optimize your recording. Digital age technology enables musicians to deliver great-sounding results from a home studio built on a limited budget. The most frugal way to build a cost-effective home studio is to keep it simple. It starts with an honest assessment of the critical components in your workflow.
Let’s break down those components:
![]() Computer:
Computer:
 Invest in a reliable computer with enough processing power to handle recording and editing audio smoothly. In theory, any average consumer system or business laptop can be used to record and produce some basic music. In practice, modest computer specs reveal their limits when the complexity of your production scales up. Nothing kills the vibe and groove faster than a buffering computer. Investing in a high-performance computer with a 64-bit operating system is recommended. It has to champion a significant amount of tracks, plugins, and sample libraries without bogging down. Budget for it generously and buy the best you can afford at the given moment. As a baseline, it would be advised to start with a computer having at least 8GB RAM and a 4-core processor. It’s also worth optimizing your computer for music production. That will work if you are using synths, producing electronic music, or any genre that doesn’t depend too much on large sample libraries.
![]() DAW Software:
DAW Software:
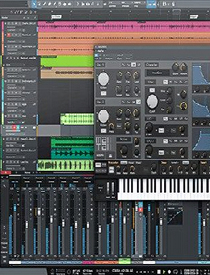 Digital Audio Workstations like Ableton Live, Logic Pro X, or FL Studio can often have free trial periods or affordable entry-level versions. If you are unsure about what a DAW is and how to decide what is right for you, try starting here:
- Free DAWS:
Audacity, GarageBand, and Cakewalk. Some of these are full-featured but they pale in comparison to paid options. These are for beginners who have no experience with audio production. You can rely on them temporarily if your budget is low, but only until you save up enough for a full-capacity professional DAW. - Limited Functionality DAWs:
Abelton, Cubase, or others. These offer free trial periods to test the software before you commit to buying it. It’s not uncommon to receive one of these packaged free with other audio gear. Many audio interfaces include a ‘Lite’ version of a digital audio workstation. - Paid DAWs:
FL Studio, Reaper, Pro Tools, Logic Pro X. They differ in features, workflow, and pricing. You’ll need to select one of these, based on what appeals to you in terms of functionality and workflow. Reaper, Cubase, Pro Tools have an efficient workflow if your focus is on recording, mixing and editing audio. Reaper is the cheapest full-fledged DAW available around $60 for a personal/small business license. Pro Tools is the “industry standard” for major studios at about $500 a year.
![]() Microphones:
Microphones:
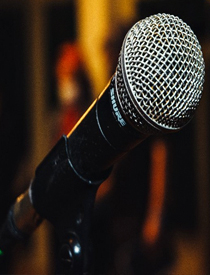 A microphone is needed, if for nothing else, for vocals. Every studio should have at least two microphones – to record audio, vocals, acoustic guitar, and other instruments. Your microphone collection can grow over time. The workhorses would be dynamic mics like Shure SM58 and Audio Technica AT202. These are tried and true that yield good results. They generally cost about $100.
![]() Instruments:
Instruments:
In addition to guitars, drums and virtual instruments on the computer, MIDI keyboards are also a useful instrument for production tasks like triggering automation, samples, and patch changes. The flexibility of MIDI in post-production means you can edit, correct, and layer performances as required. Depending on your size requirements and space abilities, MIDI keyboards can range from compact 25-key models to 88 keys with full-sized keys.
![]() Audio Interface:
Audio Interface:
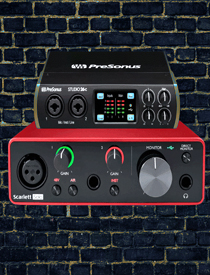 An audio interface device to connect your microphone and other instruments to your computer is essential. An audio interface acts as the intermediary between the analog realm of sound and the digital realm of your computer. Your choice of an interface must factor how many inputs you need or how many sources you plan to record at once. Interfaces vary primarily in terms of the number of inputs and outputs. Most people only use a single pair of studio monitors, which means two outputs are necessary. Mixing engineers may need multiple reference speakers and outboard gear in their setup, making the requirement four outputs. Most interfaces in the entry-level category have 2-input and are geared towards small recording studios. If you plan to record a drum kit or a full band, you will obviously need more inputs unless you’re using a separate mixer or board.
![]() Headphones:
Headphones:
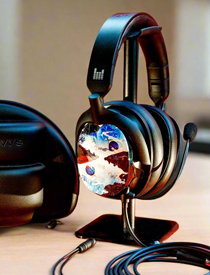 Choose a good pair of headphones that provide good sound isolation and a flat frequency response for monitoring recording. As with monitors, flat headphones are preferable in the studio. A flat sound ensures accurate reproduction without adding its own EQ. They should be flexible and must seal firmly around your ears. A good seal will also assist in preventing sound bleed into a microphone when you record. If you will be recording multiple musicians simultaneously, you need enough headphones to cover monitoring for everyone. Sennheiser makes a professional group of headphones, but can be quite pricey. Sony also has a full line of phones, where budget may factor into your available selection.
![]() Studio Monitors:
Studio Monitors:
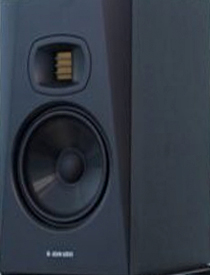 For mixing and mastering, opt for near-field monitors to accurately hear your audio. Studio monitors are designed to be flat or neutral tone, meaning that no frequencies are artificially boosted or cut. Good reference speakers will make a noticeable difference to your home recording studio if you plan to mix and master. Monitors are typically classified in terms of the size of their driver, ranging from 3-4 inches up to 10-12 inches. The bigger drivers output more power and can produce lower frequencies. Speaker placement and room treatment should be factored into your choice. For small to medium-sized rooms, studio monitors with 5 or 6-inch drivers are adequate around $300 to $400 a pair. Larger room areas may require 7 to 8-inch studio monitors.
![]() Room Acoustics:
Room Acoustics:
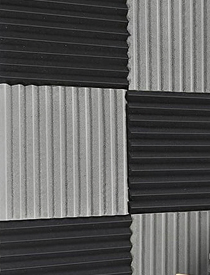 To dampen sound reflections in your recording space, it is probably advised to use materials like blankets, foam panels, or egg crate foam. Whether you’re recording through a microphone or mixing a track, your biggest enemy is going to be echo and sound reflecting off walls and other surfaces. Controlling the acoustics in a room involves using special materials to minimize these reflections. Bass frequencies tend to be the most problematic to control in small rooms. They can reflect off walls and interact with the original sound wave. To combat this, panels of absorptive material like foam panels, rockwool, or glasswool can be placed in strategic positions to minimize low-end reflection. Widely available acoustic foam is also useful to control reflections of higher frequencies. A combination of high and low-frequency absorption materials can be used to ‘deaden’ a room in a balanced way to ensure maximum neutrality.
![]() Recording Space:
Recording Space:
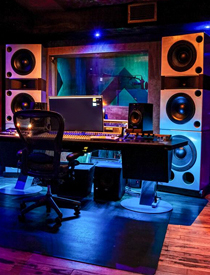 Selecting your location for your ‘studio’ is important. A quiet room with minimal background noise is preferred. The size of your home recording studio depends entirely upon how you plan to use it. Are you planning to track a drum set or a full band? Find a space large enough to accommodate a band plus the equipment. Spare garages, large basements, and the sort would accommodate such a task. If you’re a self-producing songwriter, an electronic music artist, or need a recording space to only record vocals, guitar, keyboards, and other individual instruments with only one or two people performing at a time, a regular-sized spare room or bedroom will suffice. Remember two things: avoid low ceilings and square rooms. Because of the physics of sound waves, low ceilings reflect sound. This results in muddy and unclear microphone recordings.
Once again, a home recording studio can be inexpensive without sounding cheap… if you do it right.